Dust can be almost poetic—a dust of powder across the cheeks or a dusting of snow on the trees—but the quotidian necessity of how to eliminate dust is not. Household dust is made up of the detritus of our everyday lives and everyday selves: dirt, soil particles, pollutants, dead skin cells, hair, pet dander, bits of bugs, dust mites, clothing fibers, even microplastics that settle on your furniture, into your carpets and curtains, or on lamps and fans. Dust contains contaminants and chemicals from the objects in our houses, so it’s important to dust and dust the right way.
But knowing how to eliminate dust is more than dancing with a feather duster. It’s a cleaning task many people are doing incorrectly, according to expert Jeri Fritz, founder and owner of Highland Park Housekeeping in Dallas. “The wrong way to dust is to start on whatever surface you see first, like the dresser or shelf,” she says. “The right way is to clean from the top down, including vents, ceiling fan, light fixtures, and artwork, because as soon as the heating or AC turns on, it will blow all that dust around.”
And don’t just start at the top of the room; start at the top of the house. Koala Eco cofounder Jessica Bragdon says, “It’s always best to begin with the upper rooms and send the dust and clutter downwards.” And always vacuum up the dust that settles on the floor afterwards. Keeping your house well-dusted is important for your and your family’s health and will make your home look clean, even if you still have to declutter a room or two. Here, 12 spots to tackle as you eliminate dust from your house.
1. Air vents
Check the vents, and if you see a lot of caked-on dust, get up on a ladder and use a portable vacuum with the round brush attachment to get 99% of dust off the vent. Fritz recommends a Miele vacuum or a high-quality HEPA filter vacuum with the round brush. Then wipe with a damp cloth. “I would always recommend rags or bamboo cloths over paper towels, for both economical reasons and to have a positive impact on the environment,” Bragdon says. “And natural fiber cloths are preferred, as synthetic microfiber cloths can release tiny non-biodegradable fibers that end up in our waterways.” For once-a-year spring cleaning, or if you’re feeling very motivated, unscrew the vent and pull out the dust inside. If your air vents are near the floor, dust them last.
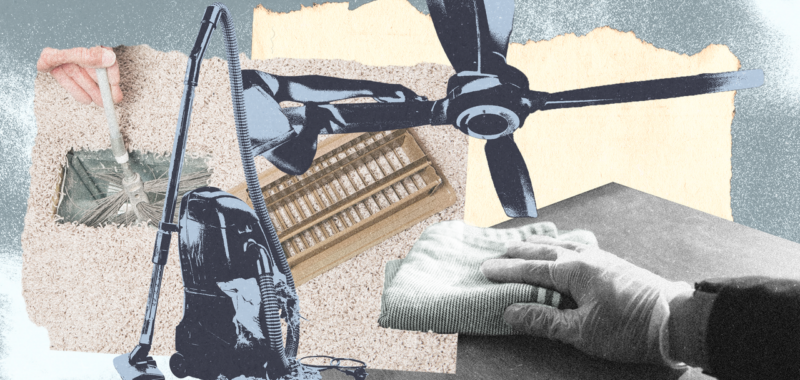
2. Ceiling fans
These should be cleaned once a month, but not with a feather duster or a Swiffer duster. “Swiffer pads contain chemicals , and most feather dusters are cheap and just move the dust around,” Fritz says. Instead, she swears by inexpensive Amazon Basic microfiber cloths. Get up on a ladder and wipe the blades with a damp microfiber cloth. In between you can use one of the dusters with the poles that bend to a 90-degree angle.
3. Curtain cornices, lampshades, and headboards
Lampshades can be frustrating to clean because the dust rolls up. The same is true of curtain cornices and fabric headboards. To prevent the clinging dust from pilling, Fritz says to first vacuum with a clean brush, then run a damp microfiber cloth across the surface every few weeks. For furniture and home decor with nooks and crannies, invest in a dusting brush that can reach the crevices.
4. Window treatments
Vacuum blinds and curtains with the soft-brush attachment on a high-quality canister vacuum. Be sure to run it over tops of any valances, or in the draping or folds, as well as behind the curtains or blinds. Follow with either a dry or damp cloth for a final wipe-down. If you have wood blinds, instead of using water on your cloth, spray it with a wood polish then wipe each individual slat.
5. Bookcases and books
Take everything off the shelves, then dampen a clean, microfiber towel in warm water and wring out to wipe the shelves and spines and tops of books. Use the vacuum’s dust-brush tool to reach into tight spots. For a spruce-up dusting, use a brush with natural bristles to get into the crevices between the spines and on top of the books. Don’t forget the very top of the bookshelf, where dust tends to accumulate.
6. Kitchen cabinets and top of fridge
Fritz says this is one room people forget to dust. The top of the refrigerator and tops of the cabinets over your range is where the dust mixes with grease and sticks. The buildup can be hard to clean. You can use plain dish soap and hot water to wipe them down regularly. Cleaning wipes can also help, as they trap the debris in the mesh of the cloth. Biodegradable L’Avant cleaning wipes might just be the unsung hero of your kitchen.
7. Wood furniture
For the most part, you can wipe all wood furniture with a clean microfiber towel. Branch Basics The Concentrate multipurpose cleaner can be diluted with water and used on wood coffee tables, dining spaces, and everything in between. Alternatively, Koala Eco mild dishwashing liquid with essential oils, also diluted with water, works as a natural polish for your wood furniture. To feed the wood, you’ll need a light oil. A tiny amount of avocado oil will treat and nourish your wood, according to Fritz.
8. Soft furnishings and upholstery
Take cushions outside and gently beat them by hand to remove dust. If there are stains, check the care labels before proceeding. Use your vacuum’s specialized upholstery and crevice tools to clean under seat cushions. Or try this TikTok hack that uses a pot lid wrapped in a microfiber cloth. Make a solution of hot water and a Tide Pod, then dampen the cloth and wrap the lid. Run the lid back and forth on the couch upholstery. For a deep-clean dusting approach, steam clean the sofa (after you vacuum up the debris) for a just-like-new finish.
9. Baseboards
First vacuum the baseboards using the round brush attachment, as that will pick up most of the dust and get the dirt off. Then follow with a damp microfiber cloth or a dusting mitt. Consider dusting baseboards at least once a week, as they tend to pick up grime quickly, especially if you have air vents in the floors.
10. Houseplants
Believe it or not, dust on the leaves of your fern or fiddle leaf fig isn’t just a bad look, it can actually hinder photosynthesis. These particles block sunlight, which could affect growth and the plant’s overall health. To rid your greenery of dust, gently wipe the leaves down with a towel and lukewarm water. Or, if you’re able to move the plant, place it in the kitchen sink or shower and spray it down with a nozzle, using low water pressure. Going forward, keep dust and dirt at bay by regularly spritzing your houseplants with a mister.
11. Electronics
The good news is, thanks to smart TVs and streaming, most of us no longer have DVD players or stacks of discs on our media consoles gathering grime. But those smart TVs still need dusting. Use a microfiber cloth to gently wipe, moving horizontally first, then vertically. If you still spot stuck-on grime, use a cleaning solution that’s safe for LED and LCD screens, such as Screen Mom (bonus: it comes with a microfiber cloth). Spray the solution onto your clean cloth, never directly onto the TV, and gently wipe. This cleaning method also works on laptop screens and tablets.
12. Beds
You’re not the only one drawn to your not-too-firm, not-too-soft, all-too-inviting mattress. Dust mites love to luxuriate here too, and these microscopic pests can wreak havoc on your allergies. To limit your exposure, wash your sheets every one to two weeks. Then once a month, use an upholstery attachment and vacuum your mattress while your bed is stripped. Be sure to get the sides in addition to the top, plus vacuum your box spring, and bed frame while you’re at it. A mattress protector can help keep dust mites away and give you greater peace of mind while you sleep in your dust-free home.