
‘Tis the season to think about decluttering, putting away seasonal clothing, and all that jazz. But today we’re going to do a deeper dive on some lesser-known areas that homeowners may have neglected to clean. Some of these areas I’ve put off in the past myself. But now that we’re almost in spring cleaning mode, let this serve as a helpful guide for all of us to tackle the cleaning before the problems set in!
Range Hood

Full Kitchen Sources
The other day I looked up at range hood, and there were grease drops hanging at the back. I thought to myself “Gross. Get your life together, Chris.” So often we’re looking down at our food cooking and not glancing up. But here is why it matters: your range collects airborne grease, oil, smoke and fumes every time you heat up the frying pan. A quick clean with hot water and a strong degreaser can work wonders.
Don’t forget about the filter. Metal mesh filters should be cleaned regularly (depending on usage). Make sure you disconnect the range hood power supply, and then remove the mesh filter and inspect for holes or corrosion. Replace if you see any damage. Otherwise, wash the filter in a sink of hot water with degreasing dish soap. If your range hood filter has disposable charcoal filters, you’ll need to replace those once or twice a year, according to Bosch. You’ll find them between the fan and the intake assembly. Most assemblies snap onto the fan, so you can open them by unsnapping them. If it has been a long time (like years) since you’ve maintained it, you may need to clean the fan, the air intake and the inside of the hood with a degreaser or dish soap as well. Dry everything before reassembling.
Faucet Aerators
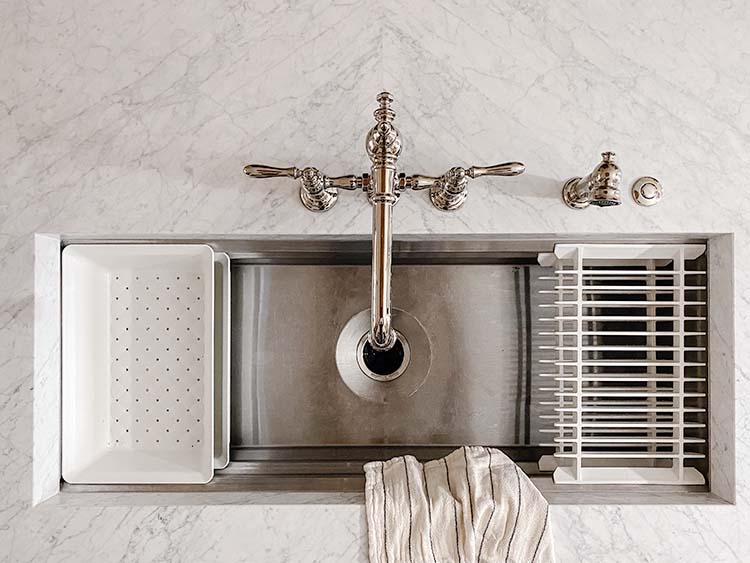
Sink | Faucet | Dish Towel
Another sneaky area that benefits from cleaning is the faucet nozzles in your house. These bathroom and kitchen aerators can get really gunked up with mineral deposit build-up over time, which can affect your water pressure. Simply unscrew the aerator counterclockwise with your hand or channel-lock pliers. (Go gently and add painter’s tape to the jaws of the pliers for extra caution against scrapes). Dissemble the aerator with a toothpick, noting the order of assembly. Clean off any larger deposit with a paper clip or sewing needle. Soak all the aerator parts in vinegar overnight or if it’s extra grimy, a lime-dissolving solution to dissolve the mineral deposits. Use a toothbrush or rag to wipe clean. If you see rust on the screen, you’ll need to replace the part (or the whole assembly). Reassemble the parts in reverse order and screw the aerator clockwise back onto the faucet spout. If any water seems to leak out, just tighten gently with the pliers.
Water Filter

The dreaded “filter replacement” light comes on the refrigerator more than it should, am I right? I guess that just means we’re hydrating well (or maybe eating too much pasta — if there is such a thing). Whether you have an in-fridge unit, a reverse osmosis system or the classic Brita pitcher, you’ll have to replace those filters often. A great tip is to buy two filters the next time you order, so you have one to replace now and one that’s ready to go. Or sign up for a subscribe-and-save option that is based on how often you typically replace them, perhaps quarterly.
Dryer Vent

Full Laundry Room Sources | Bradley Teal/Teal Rug
Did you know that unclean dryer vents are the leading factor contributing to dryer fires? The National Fire Incident Reporting System says that 31% of clothing dryer fires came down to that simple fact. Scary! While cleaning the lint filter is a pretty well-known task (you should do it every time!), the dryer vent is often neglected. You should clean them once a year by a professional or you can do it yourself with a vent brush if you have the know-how. If your clothes have been taking longer to dry than normal, a clogged dryer vent could be the reason.
Dishwasher Filter

You’re not alone if you’ve only ever thought about cleaning this when your dishwasher stops working properly. But fear not, this one has quick payoff. The dishwasher filter really just need to be washed. It’s a filter that’s built into the dishwasher, but it can be removed pretty easily. Our dishwasher will beep at me to remind me to either do it or clear the prompt. But there was one time that I just kept clearing the notification over and over again, and the dishwasher wouldn’t drain properly. Water was pooling up into the bottom of the dishwasher. So don’t let that happen to you. I’ve started cleaning ours around once a quarter so there’s no more pesky build-up.
Air Filters – calendar reminder
Many new homeowners don’t realize that air filters should be replaced every 60-90 days for the best air quality, according to the EPA. These air filters protect your HVAC system, which you don’t want to degrade any quicker than it does due to cost. You’ll find your air returns either on the ceiling or the wall of your home — usually there is at least one per HVAC system. Simply open each air return, capture the filter size on the current filter and toss it out. Then the next time you’re at the hardware store or big-box retailer like Wal-Mart, grab a multi-pack so you’re set for the following quarter too. You can keep a note in your phone of the sizes and then set a calendar reminder — say, the first of the month — to purchase more. There are even subscription services for air filters that make it really easy.
Bonus tip: Consider the MERV rating (or the tightness of an air filter’s mesh weave) before buying. Too high and you’re taxing your HVAC system. Too low and you’re letting through a lot of dust and allergens into your air. The EPA recommends a MERV rating of 13, which is toward the high end for residential use and suitable for most modern HVAC systems. Our pleated air filters help clear out pet dander and project dust — all key to spring cleaning.
Oven Window

Cleaning the exterior window of the oven is as simple as a quick wipe-down with a glass cleaning spray and some stainless steel cleaner (if you have a stainless steel oven of course.) But the “fun” begins when you get to the inside. A go-to homemade solution for the interior window is a paste of baking soda and water, with a few drops of a degreasing dish soap (such as Dawn). Spread the paste on the glass and let it sit for at least 15 minutes. Then you can scrub it clean with a non-abrasive sponge and wipe dry. A microfiber cloth can help to achieve that streak-free shine. It’s great to do this around 1-2 times a month if you cook frequently.
If you’re not seeing any progress for stuck-on splatters, I have a trick that has worked in the past. Use a single-edge razor blade (they also make oven scrapers) and dampen the glass with water or the solution above. Then just scrape the flat edge in overlapping rows until you can see clearly now (the rain — ahem, gunk — is gone). It does work wonders when all else fails.
Your turn!
The key is not to try to tackle these all in one weekend. Spread them out, put on a little music, enlist your significant other or roommate to pitch in. Create quarterly reminders that help you stay on top of the cleaning. All of these can help with the function of your home and appliances and avoid potentially costly repairs (or worse).